This project is one of my favorites. I am so thankful for ThreadBanger for creating this project. (ThreadBanger is a YouTube channel dedicated to sharing DIY projects.)
Many DIY clothing projects out there on the internet are mostly for women or children. So, one reason why I love this project is because it is an amazing project for men. (Note: this project can totally work for women, too.) Another reason why I love this project is because it encourages RECYCLING. I used two old shirts that I have not worn for over a year and made a new shirt that I can not wait to wear out!
All of the steps for this project are in the ThreadBanger video. Please watch it!
 |
| (Picture taken from ThreadBanger's youtube video) |
Figure 1 shows shirt 1. The only flaw with this shirt was that the neck hole was a little tight.
 |
| Figure 1 |
Figure 2 shows shirt 2. This shirt was one of my favorites. However, it was a little large, and it acquired some annoying little holes near the bottom.
 |
| Figure 2 |
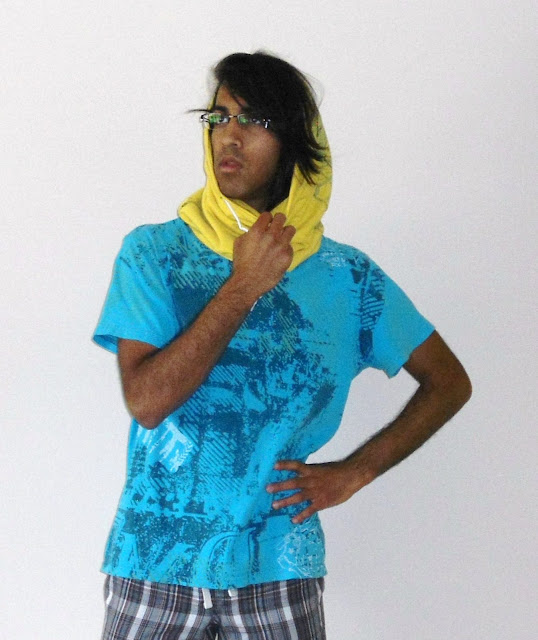
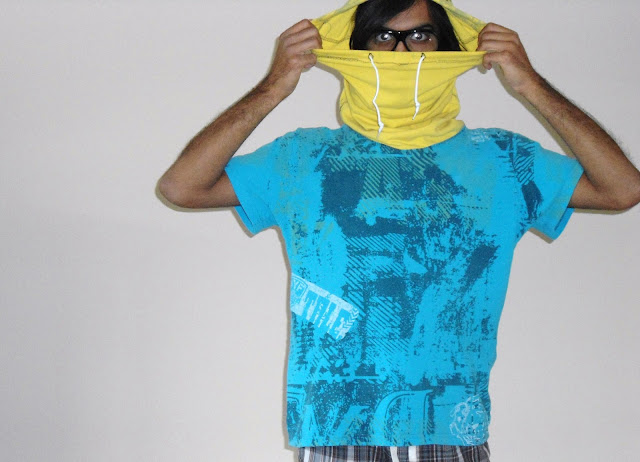
Figure 3 shows the finished product! I love the cowl look. It was a risk for me to make the cowl from a shirt with a contrasting color from the base shirt. In fact, my parents thought that the cowl was a separate piece.
 |
| Figure 3: Cowl form |
Figure 4 shows the finished product with the cowl up in a hood. I laugh every time I see this picture because my long hair makes me look like an old lady.
 |
| Figure 4 |
CHANGES FROM VIDEO: I did some steps a little differently.
Change 1: Figure 5 shows the first difference. I wanted a little more length in the hood, and I wanted to avoid the holes. So I cut the cowl portion a little differently.
 |
| Figure 5: Cowl was cut differently |
Change 2: I sewed and finished the seams a little differently. First I sewed everything with a straight stitch. I did this so that everything would line up nicely. Second, to finish the seams, I put the seam allowance to once side and did a zig-zag stitch over all layers of fabric. I made sure to line up one edge of the zigzag with the seam (seen best on the blue edge in Figure 6). Then I cut off the excess. I finished the project this way to emulate a coverstitch. The bottom hem of a generic t-shirt is done with a coverstich. If you check the back side of the bottom hem of a t-shirt, you'll notice how the coverstitch covers the raw edge. This stitch prevents the edge from fraying and getting in your way. It is a very smooth finish. So I tried to emulate the coverstitch so that I could have smooth edges that didn't bother my neck. The threadbanger video shows sewing all seams with a zigzag stitch. This was a simple way to emulate serger. Either way works; my process is a bit time consuming.
 |
| Figure 6: Seams finished a little differently |
Change 3: Before adding the shoe lace, I actually made button holes with the sewing machine. I had to do this BEFORE sewing down the hem. I did this for a cleaner finish.
Time for more fun pictures!


No comments:
Post a Comment