Patterns are everywhere! The railings on your staircase, corn fields, and even bar codes are examples of how patterns are present everywhere in our lives (note: corn fields for the mid-westerners). I find the repetition of patterns really intriguing because I like discovering how different shapes fit into themselves. Recently I've been into leopard print. Leopard print is an allover pattern of spots. It is not very high end, but it can be a fun surprise if worn in the right occasion.
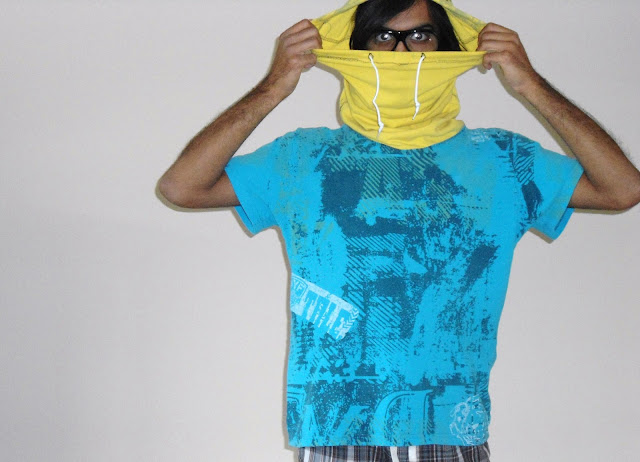
Of course this means I figured out a way to make a really obnoxious, super tacky garment that might not be worn in appropriate places (like my graduation):
This blog post explains how to make this printed shirt WITHOUT screen-printing:
For more information on patterns, including definitions, please go to the following website:
Overall process (for those who do not want to read): Come up with a MOTIF (template, the unit of repeat), and use BLOCK REPEAT (like a grid)
STEP 1: Come up with a MOTIF
Leopard print looks like a random bunch of spots. There was no way I was going to make all the individual spots free hand. It would have taken a lot of time, and I would have made many spacing errors. So I made a motif. First, I had to figure out how to make and space the spots. The blue post-its in Figure 1 show some of my rough sketches. I knew I had a lot of space to cover but not a lot of time (especially because I was not screen printing). After practicing a few times, I was ready to make a motif. I decided to make this on a regular sheet of paper (8.5''x11''). I chose this size because it would be easy to make a stencil. My motif is the orange sheet in figure 1. It was really important to make the repeat look continuous, uninterrupted between the repeated motif. So I made copies of the motif and put them side-by-side to make sure it blended together smoothly. Then I adjusted the spots to cover any large gaps. (I originally made tetris-like pieces, as you can see in Figure 1, but you can just put the copies together and adjust accordingly).
 |
| Figure 1 |
STEP 2: Make Stencil
The easiest way to do this is to take your motif and laminate it and then cut out the spots with a blade (figure 2). I already had laminated sheets that I was going to throw away. So I just taped the print to the laminated sheet and then cut out the spots (RECYCLE). I put a cardboard underneath so that I wouldn't scratch the table. The cardboard was from a cereal box (RECYCLE).
 |
| Figure 2 |
INTERCEPTION STEP: Do a trial run.
The following steps needed to be completed on a trial first. This allowed me to figure out the properties of the fabric paint and how my stencil would fit. For this I used an old shirt that fit a little weirdly (aka: will become a work-out shirt). Yes, this shirt has the logo of my alma mater (figure 3). U-Rah-Rah.
 |
| Figure 3 |
STEP 3: Set up
Put cardboard INSIDE of the shirt. This is to prevent the paint from bleeding through to the other side. I used old cereal boxes for this (figure 4).
 |
| Figure 4 |
STEP 4: Attach stencil and sponge paint
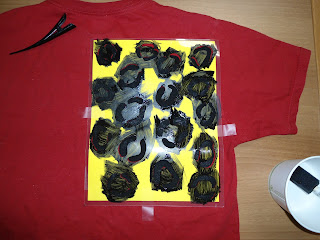
For this project I used Jacquard fabric paint. I attached the stencil with tape and hair clips (clothespins would work too). I made sure the the stencil was FLAT so that the paint would not seep underneath. Then I dabbed the brush over the holes. I did not make sweeping strokes because that would have caused paint to go further than the holes (figures 5 and 6).
 |
| Figure 5 |
 |
| Figure 6 |
STEP 5: Remove Stencil, Wash Stencil, and Repeat
After covering all the spots (figure 6), let the stencil sit for a few minutes. Then remove the stencil. Wash the BOTTOM of the stencil. A little bit of the paint spreads on the bottom. It's important to wash the bottom of the stencil so that you can prevent paint from getting in unwanted areas when readjusting the stencil. Next, place the stencil over in the "next grid" and repeat the sponging (Figure 8). On the trial I only used the stencil twice. On the actual shirt, I used the stencil EIGHT times--4 on the front and 4 on the back.
 |
| Figure 7 |
 |
| Figure 8 |
 |
| Figure 9 |
STEP 6: Let the paint dry
STEP 7: Heat set
You have to heat set the fabric paint. It's just a property of the paint to make it permanent. To do this I recommend putting a sheet of fabric over the print so that you don't ruin the iron (Figure 10). Thanks to Matt for letting me borrow his iron!
 |
| Figure 10 |
STEP 8: Wash
Even after you heat set the paint, some of it will come off. So you need to wash the garment. If you wash it properly, the ink will not ooze into the rest of the garment when you slash water on it (Figure 11).
 |
| Figure 11 |
BACK TO PROJECT STEP
Now that you have tested the trial, do steps 3-8 on the shirt you would like to have a print on. I wanted an OBNOXIOUS shirt, so I obtained a neon yellow shirt for this project. This is a great opportunity to RE-USE one of your old shirts!
Hint:
Even after covering the most of the shirt, there were still little areas that were uncovered. For these areas, I used the stencil to traced the spots with a fabric pen (figure 12). Then I painted in these spots with a brush. I did this to save me time from constantly washing the stencil.
 |
| Figure 12 |
HIDDEN STEP: Have Fun
Tacky shirts work for so many purposes. I used it for a dormal:
I let my friend use it for a work-related-dance-party:
I even took shameful selfies, and shamefully photoshopped them:


