Wednesday, May 30, 2012

Reconstruction: Yellow Sweatshirt

I have taken many design courses, watched all Project Runway episodes multiple times, read a plethora of information regarding clothing construction, and talked to other sewers.  All of these sources had one common message: inspect and reconstruct existing clothes.  

My professors would tell me to go to stores and look at the clothes to see how they are made.  This would teach me different ways to tackle different sewing ideas. "Fashion Inside Out" by Daniel Vosovic talks about buying old clothes from thrift stores, taking the garments apart, and putting them back together.  Doing these tasks would teach me how clothes are made, too.  Simply stated, clothes that already exist are some of the best teachers.  

Project Runway has had many challenges where the contestants needed to take old clothes and make something new.  The point of these challenges was to take dated trends and make them new, something I imagine is very important in the garment industry.  This shows me that reconstruction is important because it will help me with the design process.

Furthurmore, another way to look at existing clothes is through the lens of sustainability.  Sustainability and green products is a huge factor in today's businesses.  Businesses are starting to add "green" initiatives to help promote products.  My only problem with this new promotion technique is that the idea of "recycling" is being pushed aside.  People are still buying products.  On one hand the products are made more cleanly, but what happens when these items are thrown away?  Do people have the same motivation to dispose things in the proper way?  I do not have a PhD in Environmental Studies or Sustainability, but I think the answer to the last question is "no."  By recycling "upcycling" old things, I can help make the world more green.


My challenge to inspect and reconstruct existing clothing came to me when I found this chunky, yellow sweatshirt in one of my dad's suitcases.  
[Above] As you can see, this sweatshirt was HUGE.  If you take a ruler and measure the length of my face and then measure the arm hole on the right of this picture (my left, the arm holding the hip), you will see that it's close to the same length.  Not only that, the top of the sleeve started way past my shoulder.  In this picture, the sweatshirt goes to the fullest part of my hip.  If I just stood up straight, the sweatshirt would have gone way past.  
My dad is shorter than me, so I have no idea why he bought this thing!  Well, maybe that's why he put it in the suitcase.
As a look, it was sort of cute... for, like, a day.  It was nice as a over-sized sweatshirt for a winter get together.  But it was more satirical than serious.  It's best use would be fore a 90s party or something.  The other use would be around-the-house use only.

I actually liked this yellow because it is so crazy.  Because of this, I decided to take it in.  Here's what I got:

[Above] Yes, much better. The sides are more fitted, the bottom does not go too low, and the sleeves are more acceptable (start where my shoulder point is).  
I added a zipper and gave it a V-neck.  I did this because I like the Mr. Rogers sweaters that are out there.  I originally wanted to add buttons, but adding a zipper was much for friendly for an already constructed piece.

This was a great recycling project!  I got a new sweater out of an old sweatshirt.  How much more green can it get?

Wednesday, May 23, 2012

Metals: A Brief Conclusion

What is "A Brief Conclusion"?  Is that the end of a chapter?  I might never know!
Last time I blogged, I talked about a copper piece I made in a short course class.  I was SO excited about what I was learned in the first class, I couldn't wait for the next!  Unfortunately, the next class was was pretty much a repeat of the first class.  This was not the teacher's fault; she taught what she needed to.  However, I chose to do a complicated project.  Because of this choice, I was only able to cut (well, in this case, saw).  In the third class, I finished my second piece and did the third.

The following pictures have descriptions underneath.

Here are all the pieces I made in the class.  I think they look so good!


This is the second piece I made.  The point of this piece was to learn about simple riveting.  Riveting allows one to attach separate pieces of metal to each other.  We not only learned how to attach the pieces together, but also learned how to make the rivets.  The rivets in the above pictures are the darker circles (on the center vertical line).  This piece took a long time to make because I did not realize how long it would take to make all of those cutouts. 

My mom is rocking this piece.  She wore the chain when she came to visit me.  After I showed her this piece, my mom snatched the piece from my hand, wove the chain between the gaps, put it on, and took it home.  No questions asked.  Cool, somebody's got to wear it!

Caption: "What."  With a period, not a question mark.

This is the third piece I made.  To repeat and clarify, I made this piece in the third class.  The objective of the third class was to learn how to solder.  If you look on the right side, you'll see that there is smaller metal slab on top of the bottom tear-drop shaped piece.  Putting those two pieces together is called "sweat soldering."
As a bonus, our teacher showed us how to make those metal balls.  Basically take a scrap piece of metal and heat it until it melts.  Metal has this a natural property to come into itself.  So when it starts melting, it will   make a ball.   I became way too excited when I saw this happen.  My classmates were laughing at my reaction.
I don't this soldering the metal balls has a special term... normal soldering?
Soldering was fun (especially when we made the metal balls).  However, I do not see myself soldering soon.  There are a lot of risks that come with soldering.  I just do not feel comfortable dealing with all of those risks.

Okay now this piece is a whole 'nother story.  My friend and I went to Free Art Friday to screen print.  Screen printing was fun, but it only took two seconds because we were not able to create our own screens. So, the only thing we were able to do was push the squeegee. The other "free art" item was...wait for it... shrinky dinks.  I was not impressed at all.  At that time, I remembered that I had seen shrinky dinks on commercials in the 1990s.  I also remembered that I thought that they were st*p*d because the outcomes they showed in the commercials were really childish.  However, my friend was geeking (understatement) out about them, so I gave it try.  Welp, i gotta say, it was actually pretty fun!  What helped was that I did not need to use some odd child-friendly template.

I think the metal chains add a strong edge to the piece.  I like how the metal chains do not make the product look cheap.  The shape (which was inspired by a lotus) helps elevate the look, too.  The only time this piece looks cheap is when you physically hold it because then you are reminded that it is a shrinky dink.

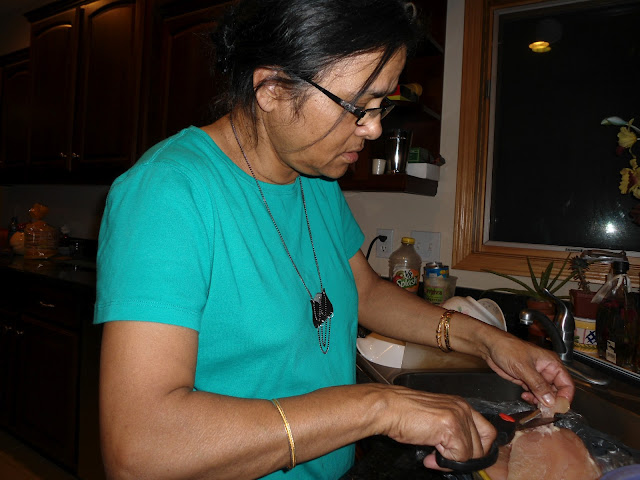
Yep, my mom is wearing the piece and cutting chicken.... Wait, is my target market my mom???!?!?!?