Tuesday, December 25, 2012

Sari Pant Hem


These are my favorite pants.  The first reason why I love these pants is because of the unique color.  The second reason I love these pants is because it is so D*MN comfortable.  The rise is perfect, the pocket space is perfect, and the leg room is perfect.


The only thing that was not perfect was the frayed bottom.  This imperfection was not okay (especially because I wanted my perfect pants to be perfect), so I decided to give it a new hem.


After I cut off all of the frayed... age... i decided to check the length of the pants to see what I needed to do. To my surprise, the pant was at a great length even though I cut about 2'' off!  This made me realize that I buy pants that are way too long.


For this project I wanted to play with outside/inside elements.  So I decided to put a decorative border on the hem to look like lining.  This way the pant would look like it is rolled-up. 

To do this I took one of my mom's old sari's and made a sort of bias covering.


I am not totally disappointed with the look.  The boarder is very feminine and a little too shiny for my liking.  However, I wanted to push the boundary, so I think the risk I took was fine.


 Yay! I can not wait to wear these in a public setting!


(PS: I do not have my camera stand with me.  When I get reunited with my stand, I'll take a full body shot to share the end result).

Tablet Cover

I'm heading over to India in less than 10 hours!  This is really exciting for me because I get to see all of my family.... But I also need to get some sleep ('cause let's be honest, I won't be able to get much in economy seating), so I'll try to make this fast.

I recently bought a Wacom Bamboo Splash tablet.

I bought this because I wanted to get into computer illustration.


So far the product is really fun and easy to use (wow, I wish Wacom would pay me for saying this).  However, the tablet didn't come with any good case.  This was a problem for me because I wanted to take the tablet with me to different places, like India, but I did not want to take the whole box.  So I decided to make my own case.   


A couple of years ago, when I was going through my fabric stash, I noticed that I had many pieces of fabric that were too small to use in a garment.  However, I felt guilty for throwing them out because it seemed like a  lot of fabric waste (these pieces were of handkerchief width).  So I cut them into 4''x4'' pieces.  The idea was to make a collage fabric.  I never got to making the fabric, but I'm glad i saved the pieces because it was a perfect idea for my tablet cover.


The main challenge was arranging the pieces to be balanced.  The other minor challenge was sewing, and this was only because the 4x4 pieces were not exactly 4x4 (they were a little skewed).

The tablet tutorial tells us to be really gentle with the pen's tip and side button.  So I was really nervous about the pen that came with the tablet.  To solve this issue I decided to add 1/2'' batting.


And here's the final result!  I'm really excited about how it turned out.  This was kind of my first venture into accessory land, and I can't say I have any regrets.  The corners are not perfectly mitered, but I'm willing to look at this as a minor set-back because the cover is perfect for it's function of carrying around the tablet.


And, the cover is perfectly travel size (the suitcase is a carry-on)!


One of my favorite features has to be the lining.  Whenever I open the pouch, it's like a passion-fruit pink surprise pops out (it's not really passion-fruit pink, but because the lining is so much brighter than the outside, it feels like passion fruit).  What is even better is that I did not intentionally choose this fabric for this project.  It just sort of pulled it out of a pile so that I could finish this project fast.  Last minute decision = awesome!!!

Saturday, October 27, 2012

Halloween Costume: Pumpkin


Yep, that totally happened!  I made my own reversible costume, AND I sort of figured out how to use Photoshop.  The only way I was able to get both of these things was because of the many resources out on the internet.

VIDEO:


Let's start with the Photoshop.  I took all of the pictures in my room.  Because my room was not a professional studio,  there was a lot of junk in the background (clothes, posters, etc).  I did not really care until I saw the attitude in first picture of this blog.  I really loved the smug attitude, but the papers, clothes, pens, etc were ruining the look.  I knew that I had to edit myself onto a cooler background to keep the intense attitude.  I knew that I did not want to use anyone else background, and that this was my first photoshop project (cheezy was okay).  So, I just made a quick background in Powerpoint 2010.
 Powerpoint 2010 is really awesome; it is so user friendly! 

I learned how to crop my body into the background from this youtube video:
http://www.youtube.com/watch?v=IFejKyZlhx0


Now let's talk about the costume.  I wanted to be a pumpkin for such a long time.  Pumpkins are very practical, non-offensive, and something I could be for many years!  I also wanted to make something reversible so that I could use this garment in more than one occasion (I was not going to spend $25 for a one-use outfit). 

The following pictures go through the process of how I made my costume.

 This was my measurements sketch.  I needed to use this to keep me organized.

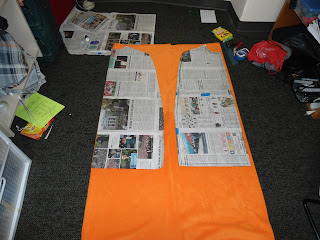
The measurements from above when directly into my pattern  I did not have pattern paper in my room.  Where pattern paper is missing, newspaper is a lifesaver!  The benefit of living on a college campus is that  free newspapers are EVERYWHERE! 

This is me fitting the newspaper pattern as muslin.  This was very necessary because I definitely had to cut off 2 inches on the back pattern piece.
A pattern paper sample is a great way to be GREEN.  You can save old newspapers to have an endless supply of "fabric."
One big issue is that the paper is very stiff and rips easily.  But hey, for someone with lower skills (like me) it's a great tool to make many mistakes. 

I bought 2 yards of fabric. I was scared that this was not enough for 4 sides.  I was over-reacting; all I had to do was fold to the salvage ends into the middle.  


This is my first project with a hood.  I learned how to make one from the following youtube video:
http://www.youtube.com/watch?v=V9a-6rr46Kw


 I was definitely successful with sewing.  I only had difficulty in the places with a lot of bulk (but that's common in all situations).  Other than that, everything went smoothly.  In fact, if you look closely at the tiger print, you will see that there's a faded horizontal stripe.  Even those stripes match up.  The following pictures show the reversibility of my garment.   


 I added a double picture to show the Photoshop (I'm proud of my work!)  I learned how to get rid of the background stuff from this video:
http://www.youtube.com/watch?v=oZzt0GEibbc


I made a video of myself reversing the costume.  However, I didn't make it into an official youtube video because I felt that it would be too pretentious.  In any case, I hope you enjoy my costume! 


Tuesday, August 14, 2012

Raglan Sleeve Reconstruction

I love Raglan sleeve anything.  Raglan sleeves are not the normal way sleeves are made.  In fact, there are some shirts where the diagonal lines are incorporated into the shirts, but the sleeves are still set-in sleeves.  I guess people do that because the lines look so good!  Raglan sleeves have an interesting way to making the upper chest area look so good!

So I wanted to make something with raglan sleeves.  I'm still not good at making sleeves, so I had to think of a way to "cheat."  Well, fortunately, I know that jersey stretches.  I used that fact to try making my first raglan shirt!

1) Find a shirt!  I used a one of my uniform t-shirts because I wanted to add a little bit of uniqueness (also I had a spare that I could use in case I got in trouble!)

2) Mark sew line and seam allowance.  I looked at raglan sleeves to figure out where the sew lines needed to go.  After making the sew line, I added the seam allowance. The picture only shows the sew line.  (In the picture you'll notice that there are double lines under the sleeve... that's just a mistake I made.  I realized that the sew line needed to be lower so that I could have a seam allowance.)


2) Cut the shirt!  Start by cutting off the collar.  Then cut the shirt on seam allowance line.  Keep the sleeve portion.  This sleeve will be used to make the raglan sleeve.

3) Make the raglan sleeve pattern.  To do this take take the cut away portion from step 2 and cut it open (follow the underarm seam).  Then trace and add seam allowances.
Things to note:
a) Mark the front and back.
b) FIRST trace the diagonal lines (the ones that cross the chest and back). Then add the seam allowance to these diagonal lines.  This won't be the actual seam allowance; this will be the sew line.  Then extend the sew line the seam allowance amount (add this to the bottom).  Then add seam allowance again for the actual seam allowance.
c)  Trace the top (the portion that was connected to the collar) as is.  Do not add seam allowances.  Then connect this line to the two diagonal lines you constructed in part b.  You might need to play around with this curve.
d) Make the under arm lines.  To do this take start at the bottom of the diagonal lines made in part a and go down.  I can not give really good directions on this part... sorry...

(The picture below only shows part of part a.)

4) Take the completed pattern and put in on an old shirt.  Then cut out the sleeve.  I used a contrasting color for the sleeves.  In the picture below, the sleeve pattern clearly doesn't fit the shirt.  That's fine; I just had to be happy with shorter sleeves!


5) Make bias tape.
Usually for knits, people turn in unfinished sides and use the cover stitch.  Unfortunately I do not have the machine necessary make a cover stitch.  Also, I don't have the right fabric for the collar.  So I decided to use bias tape to finish the edges (collar and sleeve opening).  I did this because people use bias tape to cover rough edges so that they do not fray.
Real bias tape is fabric cut on the diagonal grain.  Bias tape is made this way so that it will stretch for easier use around corners.  Well, I cheated on this step, too.  I know knits are stretchy.  Because of this lovely quality, I just cut out two inch thick strips.  I cut these strips out of the remaining shirt pieces so that it can stay the same color.  After I cut the strips, I folded long sides into the middle, and then I hot dog folded it (for a better explanation of this double fold, please look at real bias tape!) Then I ironed it down to keep the folds in place.  Pins helped me a lot in this step.


5) Sew the shirt!
First attach the sleeves.  Because there are no sides seams on the body, you have to add the sleeve in a set-in sleeve matter.  So first sew the under arm seam, and then attach the sleeve to the body.
Then, add the bias tape!

I'm really happy with the result! It looks like a raglan shirt, so I can't really complain!  The only issue is the collar.  In a "normal," mass-market shirt, the collar tapers down.  In this shirt, the collar sort of sticks out because the bias tape is the same length as the collar hole.  Oh, well.  I'm willing to over look that fact.

What really excites me is that this is another great RECYCLING project!  I took old shirts and made a new one.

Monday, June 18, 2012

10 Shirt Challenge


My family is in the process of renovating our house.  We made space for new furniture, and we're getting rid of things that have no value other than taking up space.  I usually go though a massive purge every year because of college (moving causes me to organize), so this kind of change is common ground.  However, as I was cleaning, I was still shocked by the huge amount of... stuff... I have.

This year, the first thing I did was go though all of my shirts.  I knew that I had too many shirts, and that many of them did not make me feel special. Plus, I did not look good in any of them.  There was no point in keeping things that (1) I did not like and (2) made me look terrible.  After all, "life it too short to have on a bad outfit!" (Kit Scarbo, Project Runway Season 4).

I was able to get rid of some shirts very easily.  Unfortunately, this was not a bigger trend.  The pile of shirts in the "keep" pile kept on getting bigger. At one point I counted at least thirty shirts!  And I still had more shirts to sort!


The growing pile had a social impact on me.  I instantly thought about the people who do not have one shirt to spare.  Why do I keep on having the urge to buy more clothes when I clearly have enough?  I also thought about where the throw-away-shirts end up when the are... expired.  Do they go into land fills like all other garbage?  I know that people give old clothes to charity, but I also realize that this isn't the reality for all clothes.  Plus, if everyone gave their old clothes to charity, the charity people are bound to throw some stuff away.

These thoughts made me question the design society. We are constantly told to buy clothes in the media.  Designers are encourage to pop out things like crazy (spring/summer collection, resort collection, couture collection, fall winter collection).  We really have too much clothes in the world!

Anyway, after this reflective moment, I decided to come up with the 10 shirt challenge.  I had to get rid of at least 10 shirts.  These 10 shirts would eventually go to our local charity.

The following picture shows how I did:


The pile on the right are the shirts that I'm getting rid of.  There are 17 shirts in that pile.  I surpassed my goal.  Awesome.
The pile in the middle are the shirts I'm keeping.  There are 22 shirts in that pile. That's still a lot of shirts considering I'm not including the shirts in the laundry or dress shirts.
The pile of shirts on the left are the shirts I can't part with. I got these 15 shirts from clubs and other school events. They have too many good memories.  HOWEVER, I'm not going to wear these shirts, either.  I'm going to save them for a project.  One of my friends took these types of shirts and made them into a quilt.  That seems like a good option for me.

Now if you do the math, 17+22+15= 54 shirts.  That's WAAAAY too much.

Try the 10 shirt challenge yourself!  Maybe even extend the challenge to other articles of clothing.  Perhaps make the category even broader!  Check out what this blog did to get rid of junk:
http://www.theartofdoingstuff.com/throw-away-50-things-you-did-it/

Overall this was a sobering experience because it made me realize that I have too many things (and I'm not one to buy things in the first place). It was also sobering because it made me consider in impact of advertisement.  Do ads tell us how to dispose of our goods when we're done with them? 

Wednesday, May 30, 2012

Reconstruction: Yellow Sweatshirt

I have taken many design courses, watched all Project Runway episodes multiple times, read a plethora of information regarding clothing construction, and talked to other sewers.  All of these sources had one common message: inspect and reconstruct existing clothes.  

My professors would tell me to go to stores and look at the clothes to see how they are made.  This would teach me different ways to tackle different sewing ideas. "Fashion Inside Out" by Daniel Vosovic talks about buying old clothes from thrift stores, taking the garments apart, and putting them back together.  Doing these tasks would teach me how clothes are made, too.  Simply stated, clothes that already exist are some of the best teachers.  

Project Runway has had many challenges where the contestants needed to take old clothes and make something new.  The point of these challenges was to take dated trends and make them new, something I imagine is very important in the garment industry.  This shows me that reconstruction is important because it will help me with the design process.

Furthurmore, another way to look at existing clothes is through the lens of sustainability.  Sustainability and green products is a huge factor in today's businesses.  Businesses are starting to add "green" initiatives to help promote products.  My only problem with this new promotion technique is that the idea of "recycling" is being pushed aside.  People are still buying products.  On one hand the products are made more cleanly, but what happens when these items are thrown away?  Do people have the same motivation to dispose things in the proper way?  I do not have a PhD in Environmental Studies or Sustainability, but I think the answer to the last question is "no."  By recycling "upcycling" old things, I can help make the world more green.


My challenge to inspect and reconstruct existing clothing came to me when I found this chunky, yellow sweatshirt in one of my dad's suitcases.  
[Above] As you can see, this sweatshirt was HUGE.  If you take a ruler and measure the length of my face and then measure the arm hole on the right of this picture (my left, the arm holding the hip), you will see that it's close to the same length.  Not only that, the top of the sleeve started way past my shoulder.  In this picture, the sweatshirt goes to the fullest part of my hip.  If I just stood up straight, the sweatshirt would have gone way past.  
My dad is shorter than me, so I have no idea why he bought this thing!  Well, maybe that's why he put it in the suitcase.
As a look, it was sort of cute... for, like, a day.  It was nice as a over-sized sweatshirt for a winter get together.  But it was more satirical than serious.  It's best use would be fore a 90s party or something.  The other use would be around-the-house use only.

I actually liked this yellow because it is so crazy.  Because of this, I decided to take it in.  Here's what I got:

[Above] Yes, much better. The sides are more fitted, the bottom does not go too low, and the sleeves are more acceptable (start where my shoulder point is).  
I added a zipper and gave it a V-neck.  I did this because I like the Mr. Rogers sweaters that are out there.  I originally wanted to add buttons, but adding a zipper was much for friendly for an already constructed piece.

This was a great recycling project!  I got a new sweater out of an old sweatshirt.  How much more green can it get?

Wednesday, May 23, 2012

Metals: A Brief Conclusion

What is "A Brief Conclusion"?  Is that the end of a chapter?  I might never know!
Last time I blogged, I talked about a copper piece I made in a short course class.  I was SO excited about what I was learned in the first class, I couldn't wait for the next!  Unfortunately, the next class was was pretty much a repeat of the first class.  This was not the teacher's fault; she taught what she needed to.  However, I chose to do a complicated project.  Because of this choice, I was only able to cut (well, in this case, saw).  In the third class, I finished my second piece and did the third.

The following pictures have descriptions underneath.

Here are all the pieces I made in the class.  I think they look so good!


This is the second piece I made.  The point of this piece was to learn about simple riveting.  Riveting allows one to attach separate pieces of metal to each other.  We not only learned how to attach the pieces together, but also learned how to make the rivets.  The rivets in the above pictures are the darker circles (on the center vertical line).  This piece took a long time to make because I did not realize how long it would take to make all of those cutouts. 

My mom is rocking this piece.  She wore the chain when she came to visit me.  After I showed her this piece, my mom snatched the piece from my hand, wove the chain between the gaps, put it on, and took it home.  No questions asked.  Cool, somebody's got to wear it!

Caption: "What."  With a period, not a question mark.

This is the third piece I made.  To repeat and clarify, I made this piece in the third class.  The objective of the third class was to learn how to solder.  If you look on the right side, you'll see that there is smaller metal slab on top of the bottom tear-drop shaped piece.  Putting those two pieces together is called "sweat soldering."
As a bonus, our teacher showed us how to make those metal balls.  Basically take a scrap piece of metal and heat it until it melts.  Metal has this a natural property to come into itself.  So when it starts melting, it will   make a ball.   I became way too excited when I saw this happen.  My classmates were laughing at my reaction.
I don't this soldering the metal balls has a special term... normal soldering?
Soldering was fun (especially when we made the metal balls).  However, I do not see myself soldering soon.  There are a lot of risks that come with soldering.  I just do not feel comfortable dealing with all of those risks.

Okay now this piece is a whole 'nother story.  My friend and I went to Free Art Friday to screen print.  Screen printing was fun, but it only took two seconds because we were not able to create our own screens. So, the only thing we were able to do was push the squeegee. The other "free art" item was...wait for it... shrinky dinks.  I was not impressed at all.  At that time, I remembered that I had seen shrinky dinks on commercials in the 1990s.  I also remembered that I thought that they were st*p*d because the outcomes they showed in the commercials were really childish.  However, my friend was geeking (understatement) out about them, so I gave it try.  Welp, i gotta say, it was actually pretty fun!  What helped was that I did not need to use some odd child-friendly template.

I think the metal chains add a strong edge to the piece.  I like how the metal chains do not make the product look cheap.  The shape (which was inspired by a lotus) helps elevate the look, too.  The only time this piece looks cheap is when you physically hold it because then you are reminded that it is a shrinky dink.

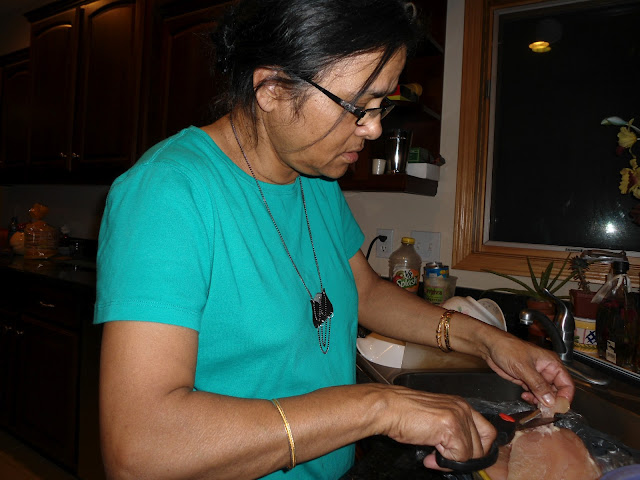
Yep, my mom is wearing the piece and cutting chicken.... Wait, is my target market my mom???!?!?!?  

Wednesday, February 8, 2012

Metals! An Introduction

This semester I really wanted to take Print and Dye.  I faked this whole scene with the Design School for a year just to be able to take the class. But alas, I felt really pressured with my other classes and decided not to take it  :(  It does have a history of being a time intensive course, and I did not want to risk that.  I'm very "risk-averse."

In any case, I decided that I needed to fill my void somehow.  In the past I took computer classes.  They were great!  I learned a lot of important skills.  Last Friday, one of my friends (a really awesome one, btw) took me to a "Free Art Friday."  Free Art Friday is a program UW-Madison has where you do art... for free.  The coordinators choose what the project is, so I guess not all of the art is free. But, it's still a great program, nonetheless.  The project at this FAF was bead making.  I got into DIY, so when I saw that the project was working with polymer clay, I got super excited.

Here are the beads I made.  They're not very unique, but with the limited time I had (I had a b-day to go to), I think I did well.  I will def, add them to a chain later.

Anyway, while I was waiting for the beads to bake in the oven, I checked out the catalog of mini-courses offered during the semester.  I knew that dying classes were offered as mini-course, so I wanted to know if there were any this coming semester.  I didn't see a dye class I liked, but I did see one with stone cutting.  

Jewelry has a special spot with me because one of my cousins is really into jewelry design.  Any jewelry related topic makes me think of her. Thus, when I saw that there was a stone cutting class, I was super excited.  However, I got a little discouraged when I saw that the stone setting class was offered off campus (not easy to get to!).  Then, I saw that there was a course (offered on campus) that teaches stone setting.... but then I saw that you need to have basic metal working skills before taking the class.  That's when I saw that there was a basic metal working class! It was perfect!  So I signed up for it.

I had the first class today.  I was SO PLEASED with class that I figured that signing up for the class was one of the best decisions I ever made.  Seriously, I can not get over it.  Everything about that class is perfect.  The students are nice, the teacher is fantastic... just thinking about it makes me happy.  

This is the first product I made. The point of this was to learn cutting and texturing.

I envisioned this pendant/thing to be with the small hole on top (for a jump ring).  But I have this picture because the lighting is really good, and it's one of the better pictures.


I can't wait for next week! :)

Seriously Tacky Pants Part 2

So after I made the first pair of pants, I was able to easily adjust it to make another pair.  I tried to experiment with this pair.
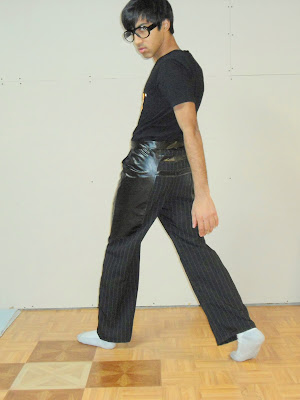
...And this is why I call them "seriously-tacky."  I used vinyl (and for all purposes, i consider them to be leather) to add visual interest. 
I did not do separate seams for everything.  I put the vinyl on top of the pinstripe and top stitched.  I decided to do this because I remember when I made similar pants, I had a lot of time issues.  Unfortunately, the fabrics were not cooperating with me this time either.  When I had the vinyl against the presser foot, the pinstripe would move, but the vinyl would not.  So I got this huge bunching mess.  So basically I had to go backwards.  This was not fun because the top stitching was not very appealing. The waste band was an issue, too.  Basically, i hand stitched the stitch in the ditch part.  I was okay with this because by the time I got to the waste band I was expecting this problem.  Also, this way I was able to avoid putting unnecessary holes in the vinyl. 
One of my classmates did a project with "leather," and I remembered the rule to not pin. [NOTE: You can use pins if it's only in the seam allowance, but it's better to just use clamps or paper clips.] 

POCKETS!!!

It does look good from the back!  However the stripes just add to the tackiness.  I'm still in love with them!

It is a little weird to walk in because the vinyl does not move well.  I also think that the rise is too low and might be affecting the front.  This is something to experiment with later.


Seriously tacky.  But Super fun.